To add a Georoute to your account, follow the steps below:
- Add a tracking number to the desired campaign. Please refer to the Add Tracking Number New UI text/video for steps on adding a new number.
- Go to the ‘Configure Routing Options’ section and choose ‘GeoRoute to a location’ from the ‘Route Calls By’ dropdown.

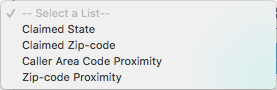
- Next, choose the routing option from the ‘route by’ dropdown that works best for you. Choosing a zip-code option is recommended to get better accuracy.

- Select ‘manage location lists’ to create a new list or choose a list from the dropdown if available. A new tab will open if you choose to create a new list.

- Select ‘Add GeoRoute List’ to create a list, proceed to fill out the information and save. Skip this step if a list already exists.

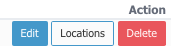
- Select ‘locations’ on the GeoRoute list.
- Next, select ‘Add Locations’.

- Proceed to fill out location information for this list.
- You may use a comma ( , ) to add multiple zip/postal codes per location

- Select ‘done’ once all information for that GeoRoute location has been entered. Go back to the previous tab to continue with the GeoRoute setup process.
- The newly added list will be available in the drop-down next to ‘Use Location List’. Select the desired list to be used for this GeoRoute setup.

- Continue filling out the rest of the tracking number set up and save.
- If your tracking number saved successfully you will see it listed under your campaign.
- Always give your new tracking number a test call immediately after provisioning and verify that it routes to the correct location. Additionally, check the call logs report to verify that the test call shows up.