To set up Call Actions follow the instructions below:
- Add a tracking number to the desired campaign. Please refer to the Add Tracking Number New UI text/video for steps on adding a new number.
- After you have provisioned a tracking number, click on the ‘Call Actions’ button located on the right side of each tracking number.
- Please note, this feature is available for select plans, if you do not have this feature enabled and would like to add it to your plan please contact the support team.


- You’ll see the form for adding Call Actions open.
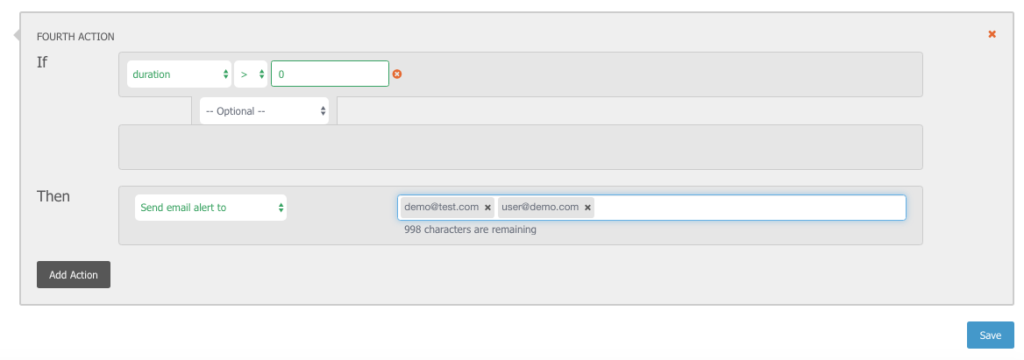
- Use the drop-downs to select conditions for your Call Action to execute upon, as well as the actions to perform when each condition is met.

- In the example below, a incoming call will send an email notification (to the emails entered) in the event that a call greater than 0 seconds is received.
- Use the ‘Add Action’ button to add additional actions if needed.

- There are many conditions to choose from, I recommend viewing each and choosing those that work best for you and/or client’s needs. Call Actions are a great way to notify individuals that a call has met their conditions.
- Press ‘Save’ after Call Action(s) have been set up.
Setting up Call Actions may also be done at the top level of the account. Please note, setting up Call Actions at the top level will create all future tracking numbers on any group level to inherit the same setup. To set up Call Actions at the top-level follow the steps below.
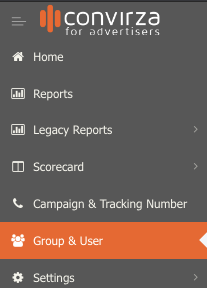
- Select ‘Group & User’ on the left side menu

- Scroll down until you find the ‘Call Actions Settings’ section for the account and select the ‘+’ symbol.

- The Call Actions form will appear. Proceed to fill out the form by selecting conditions from the dropdown options.

- Select ‘Save’ after the Call Action(s) is entered.
- Now each tracking number added to the account will inherit the same Call Action(s).
